
Searching for cases or files
2025-08-20Last updated
If you have many cases and files in the system, you can find a specific case or file from the Search page by using keyword searches, category, date and time filters, case status, case associations, device assignment filters, or by finding the case or file on a map.
What you should know
- Thumbnail previews are displayed in search results for the following files: BMP, PNG, JPEG, GIF, Icon, and MP4.
- When you select Specific dates, any cases or files that have at least 1 minute of their duration within the time range are displayed.
Procedure
-
In the Search field, type keywords or tags related to
the case or file, and press Enter or click the search button (
 ).
).
-
(Optional) Filter your search by date or time: click
Date and time (
 ) and select the options that you require.
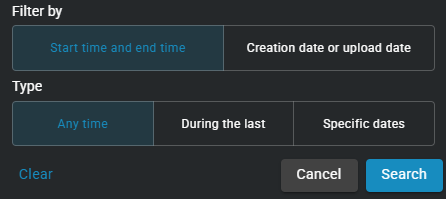 From the Filter by section, define the following:
- Select Start time and end time to filter your search for results with a start and end time that occur within the time frame defined in the Type section that follows.
- Select Creation date or upload date to filter your search for results with a creation date or upload date that occurs within the time frame defined in the Type section that follows.
From the Type section, define the time period that applies to your search:- Select Any time to search all time ranges.
- Select During the last and define a period of time back from the present time that you want to include in the search.
- Select Specific dates to search a specific time range. Enter a date and time, or use the calendar and date icons to select a specific time range.
-
Click Filters (
 ) to open the search filter
menu.
) to open the search filter
menu.
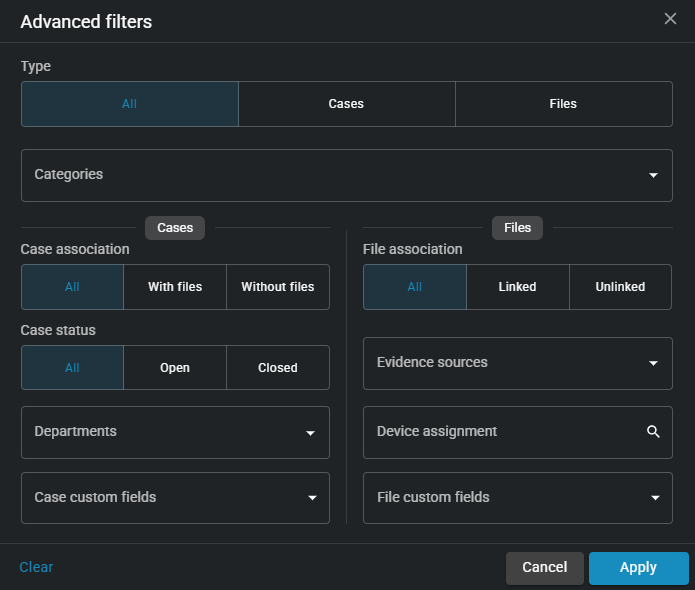
-
(Optional) Filter your search by device
assignment.
- Click Device assignment and select the options that you require.
-
In the Search field, type a user
name or email address, and press Enter or click the
Search button ().
- Select the user that you require and click Confirm.
Tip:Click on the name of a column to sort it in ascending or descending order. -
(Optional) Click Settings (
 ) to add or
modify fields in your search.
Tip:You can drag and drop fields in the search bar to reorder them. The order of your search fields is saved to your browser and appears in the same order the next time you log in.
) to add or
modify fields in your search.
Tip:You can drag and drop fields in the search bar to reorder them. The order of your search fields is saved to your browser and appears in the same order the next time you log in.
Example
Watch this video to learn more. Click the Captions icon (CC) to turn on video captions in one of the available languages.