Creating video request forms
2020-10-06Last updated
System administrators can create video request forms in Clearance to ensure compliance with corporate standards when managing video requests. These request forms can be customized and are used to gather additional information specific to your organization and the approval workflow.
What you should know
- Users or groups in the Manage forms security policy can create or modify video request forms. System administrators is the default value for the policy.
- Only one request form can be active at a time.
Procedure
-
Click .
-
Click Create video request form (
 ).
).
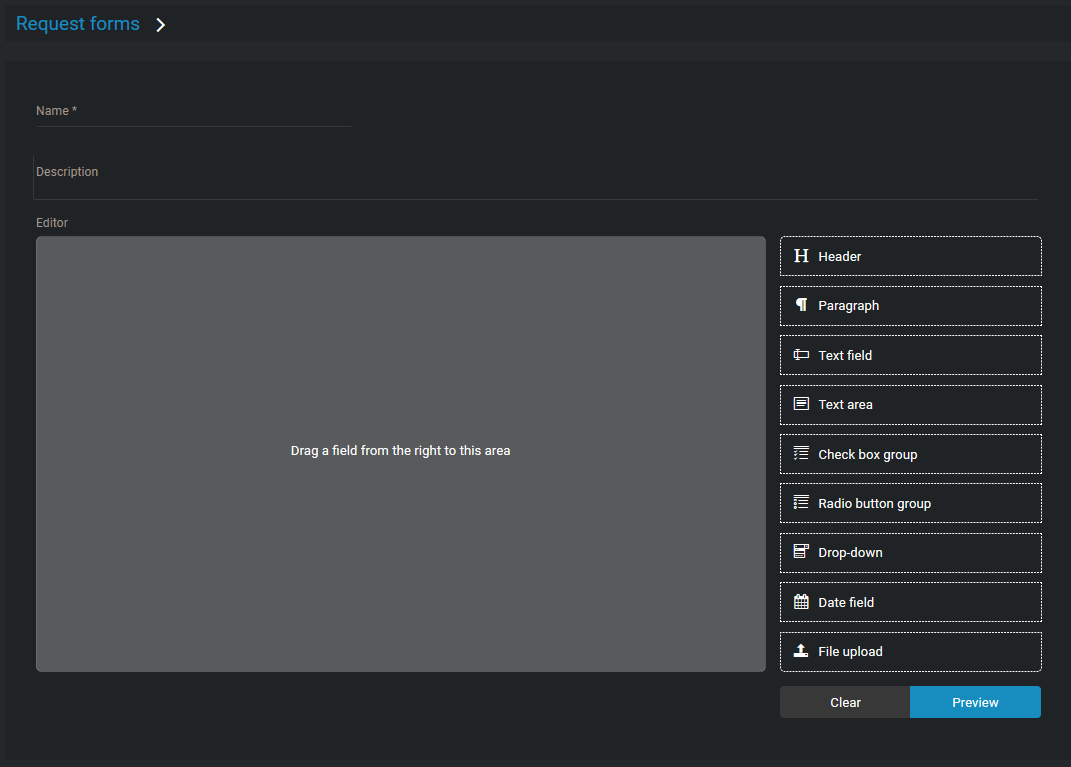
-
Drag form elements from the list into the Editor pane and move to
the required position in the form.
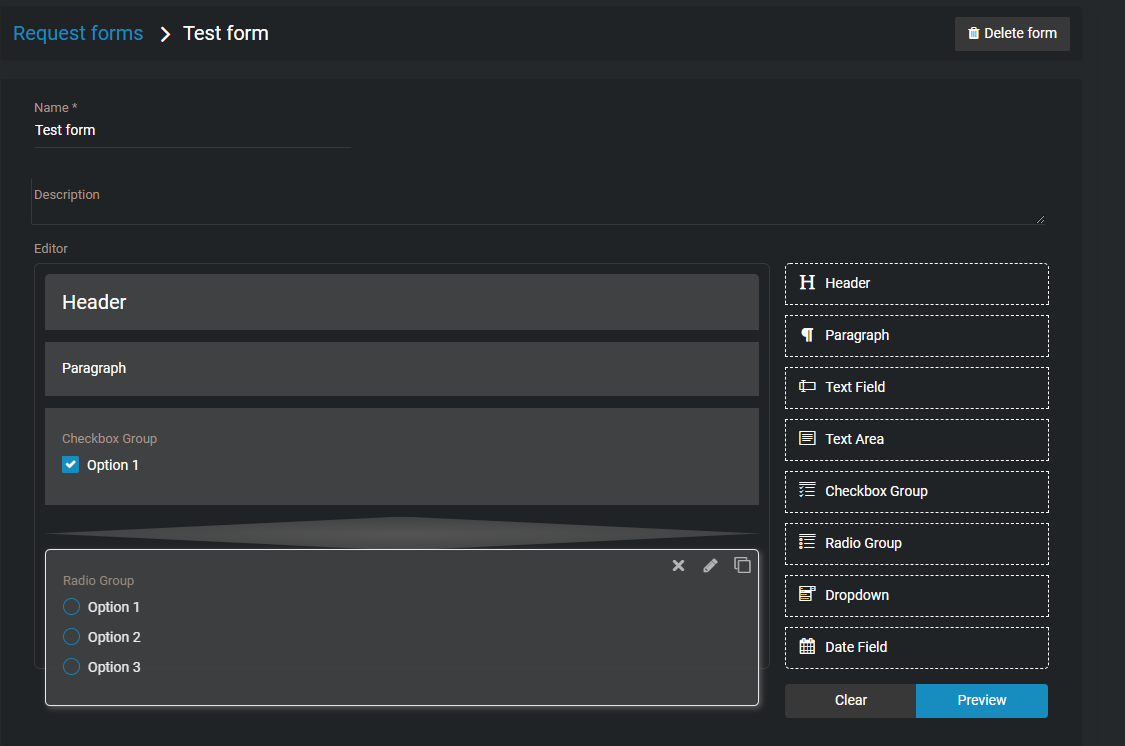
-
Click
 in each form element to modify the form contents and options.
-
(Optional) Configure Text field options.
- Text field
-
- Required
- Select the check box to make completing this form element mandatory.
- Label
- Enter the name or title of the form element.
- Help Text
- Enter help text to display when
 is clicked in the form.
 - Placeholder
- Enter hint information that is displayed in the field. For example, Enter text here or Explain the incident.
- Class
- Specifies advanced customization options. For more information, contact technical support.
- Value
- Used to specify a default value for this field in the form.
- Max Length
- Specifies the maximum number of numeric characters in the field. For example, you could specify 50 characters or you could set field length to match a use case like badge number length.
-
(Optional) Configure Text area options.
- Text area
-
- Required
- Select the check box to make completing this form element mandatory.
- Label
- Enter the name or title of the form element.
- Help Text
- Enter help text to display when is clicked in the form.
- Placeholder
- Enter hint information that is displayed in the field. For example, Enter text here or Explain the incident.
- Class
- Specifies advanced customization options. For more information, contact technical support.
- Value
- Used to specify a default value for this field in the form.
- Max Length
- Specifies the maximum number of numeric characters in the field. For example, you could specify 50 characters or you could set field length to match a use case like badge number length.
-
(Optional) Configure Check box group options.
- Check box group
-
- Required
- Select the check box to make completing this form element mandatory.
- Label
- Enter the name or title of the form element.
- Help Text
- Enter help text to display when is clicked in the form.
- Inline
- Select the check box to display multiple check box options in a line.
- Class
- Specifies advanced customization options. For more information, contact technical support.
- Options
- If you want to pre-fill the options, select one or more check boxes. Enter a name or title for each check box option.
- Add Option+
- Add additional option choice elements.
-
(Optional) Configure Radio button group options.
- Radio button group
-
- Required
- Select the check box to make completing this form element mandatory.
- Label
- Enter the name or title of the form element.
- Help Text
- Enter help text to display when is clicked in the form.
- Inline
- Select the check box to display multiple radio button options in a line.
- Class
- Specifies advanced customization options. For more information, contact technical support.
- Options
- If you want to pre-fill the options, select a radio button. Enter a name or title for each radio button option.
- Add Option+
- Add additional option choice elements.
-
(Optional) Configure Drop-down options.
- Drop-down
-
- Required
- Select the check box to make completing this form element mandatory.
- Label
- Enter the name or title of the form element.
- Help Text
- Enter help text to display when is clicked in the form.
- Placeholder
- Enter hint information that is displayed in the field. For example, Enter text here or Explain the incident.
- Class
- Specifies advanced customization options. For more information, contact technical support.
-
(Optional) Configure Date field options.
- Date field
-
- Required
- Select the check box to make completing this form element mandatory.
- Label
- Enter the name or title of the form element.
- Help Text
- Enter help text to display when is clicked in the form.
- Class
- Specifies advanced customization options. For more information, contact technical support.
- Value
- Used to specify a default value for this field in the form.
-
(Optional) Configure File upload options.
- File upload
-
- Required
- Select the check box to make completing this form element mandatory.
- Label
- Enter the name or title of the form element.
- Help Text
- Enter help text to display when is clicked in the form.
- Class
- Specifies advanced customization options. For more information, contact technical support.
-
(Optional) Configure Text field options.
-
(Optional) Click
 to copy a form element.
-
(Optional) Click
 to
remove a form element.
to
remove a form element.
-
Click Preview to see a rendered version of your request
form.
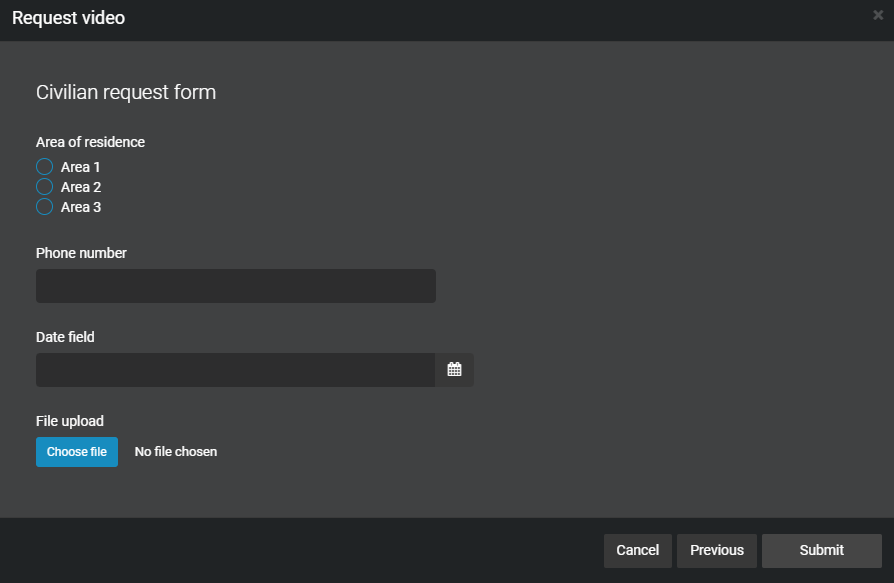
Figure 1. Example video request form